Converting a cordless tool battery to use a cord – chapter 2
Dissecting the internals of the battery pack
 I started by snipping the leads on the bottom of the battery pack, leaving as many cells grouped together as possible. This, in case I needed to measure anything as I work through the project. I then pried the positive lead from the cell below the stem.
 The “-” terminal is soldered to the top of the stem. Later in the project I’ll solder the “-” lead to this tab.
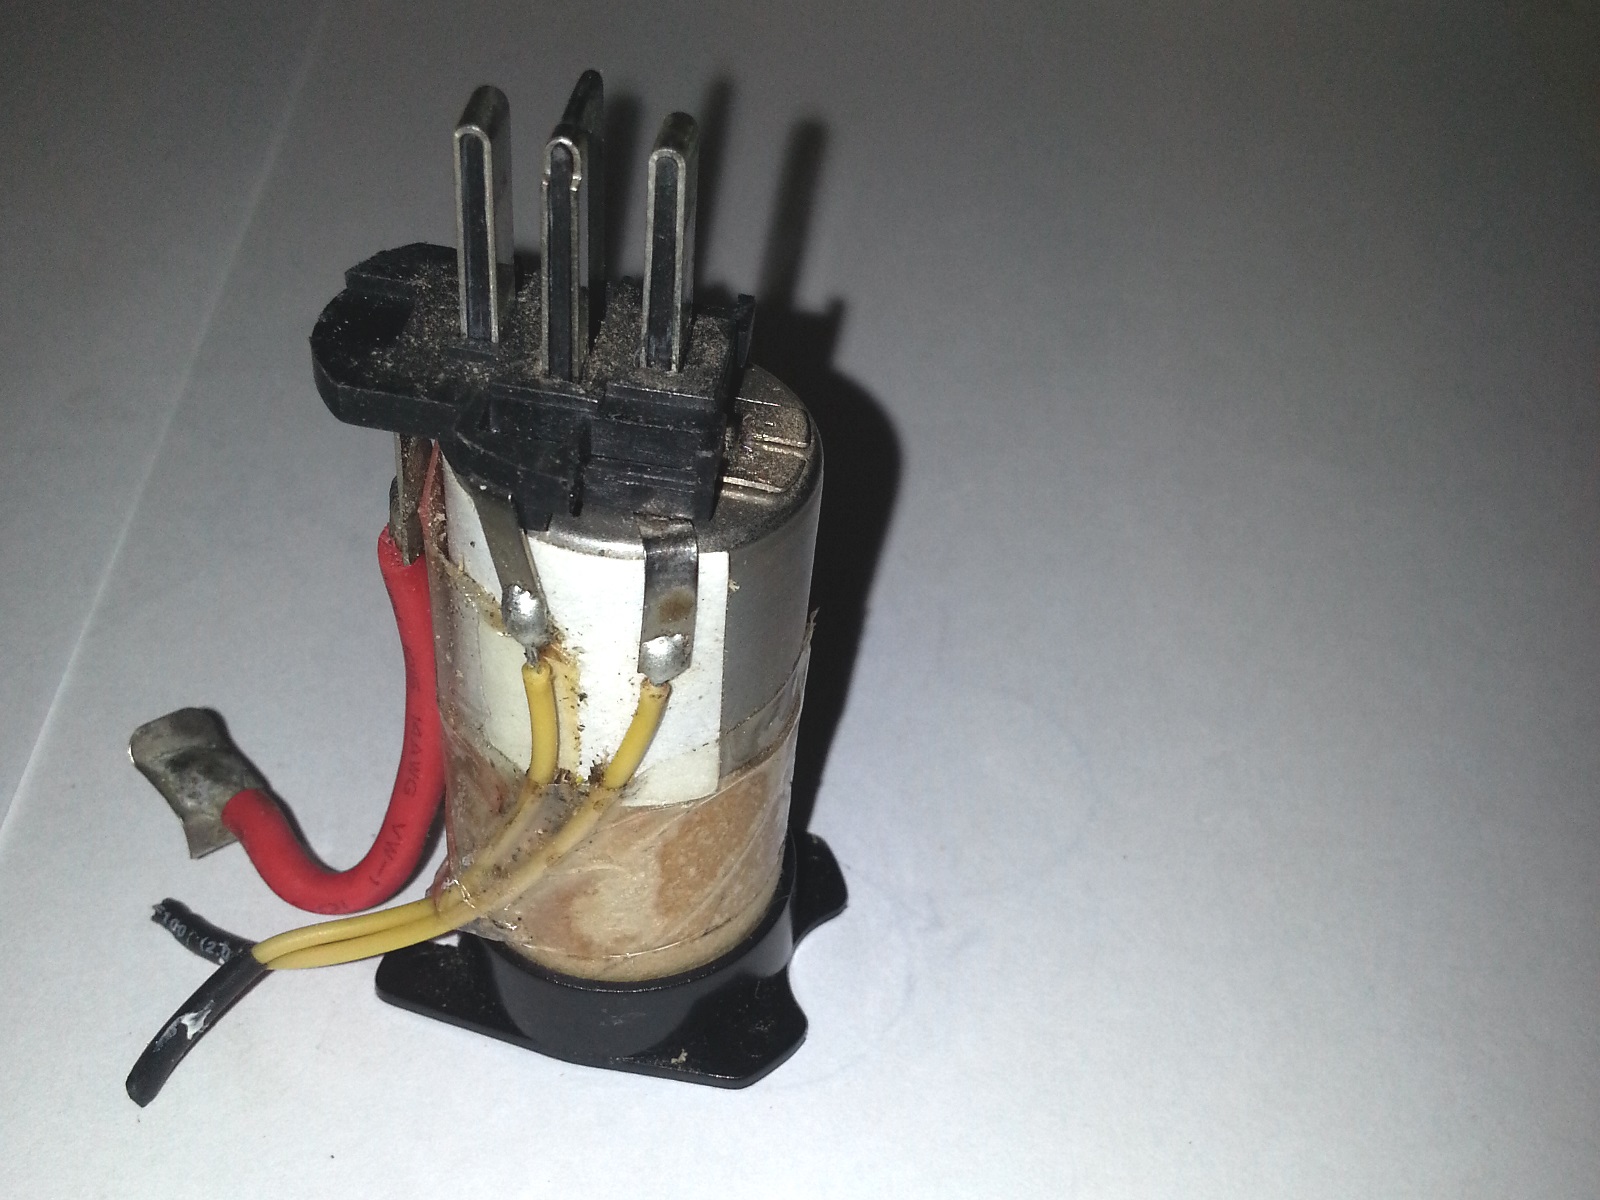 This is the top cell, the stem foot, and the leads still soldered in place.
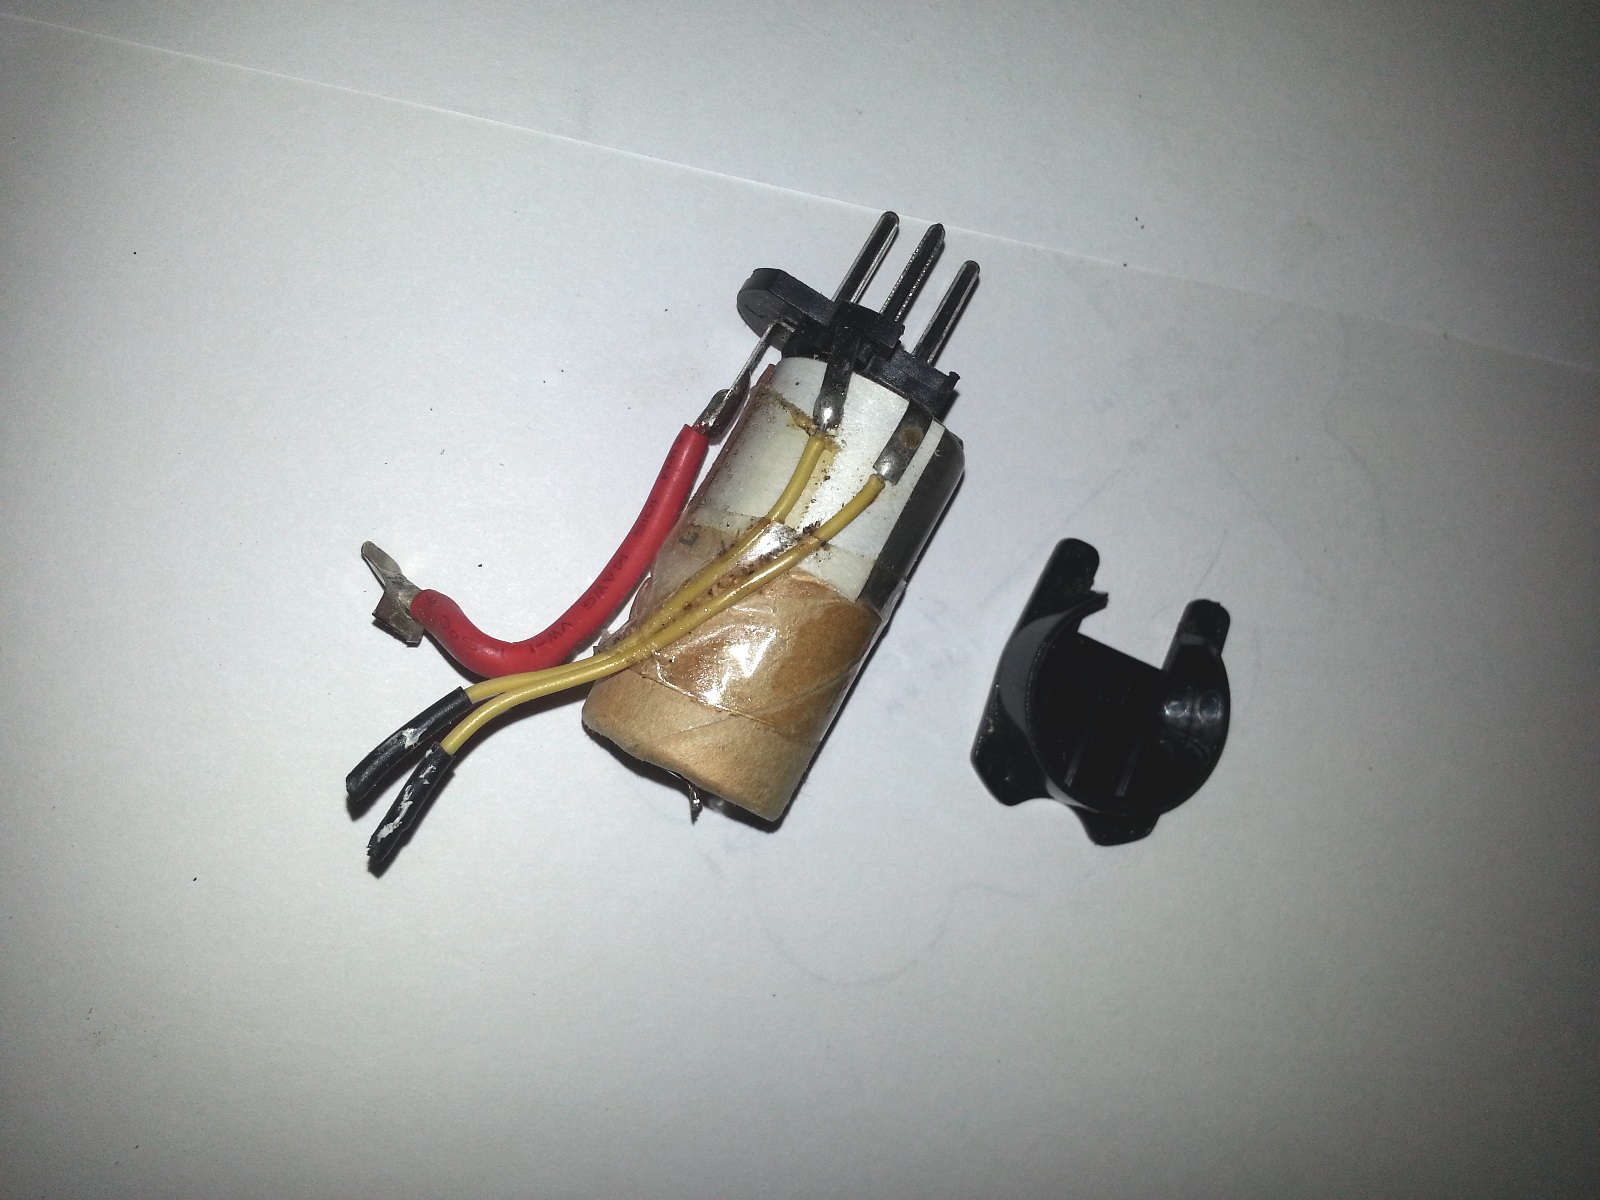 …Another shot of the top cell, the plastic stem foot (now detached), and the leads still all soldered in place.
 I took my time pulling the “-” terminal apart, and even though it’s a small tab, I managed to get it to cleanly detach. If it hadn’t been soldered directly to a battery cell I would’ve just de-soldered it. I don’t know if soldering, or de-soldering to a battery like this is dangerous or not, so I figured it was best to play it safe.

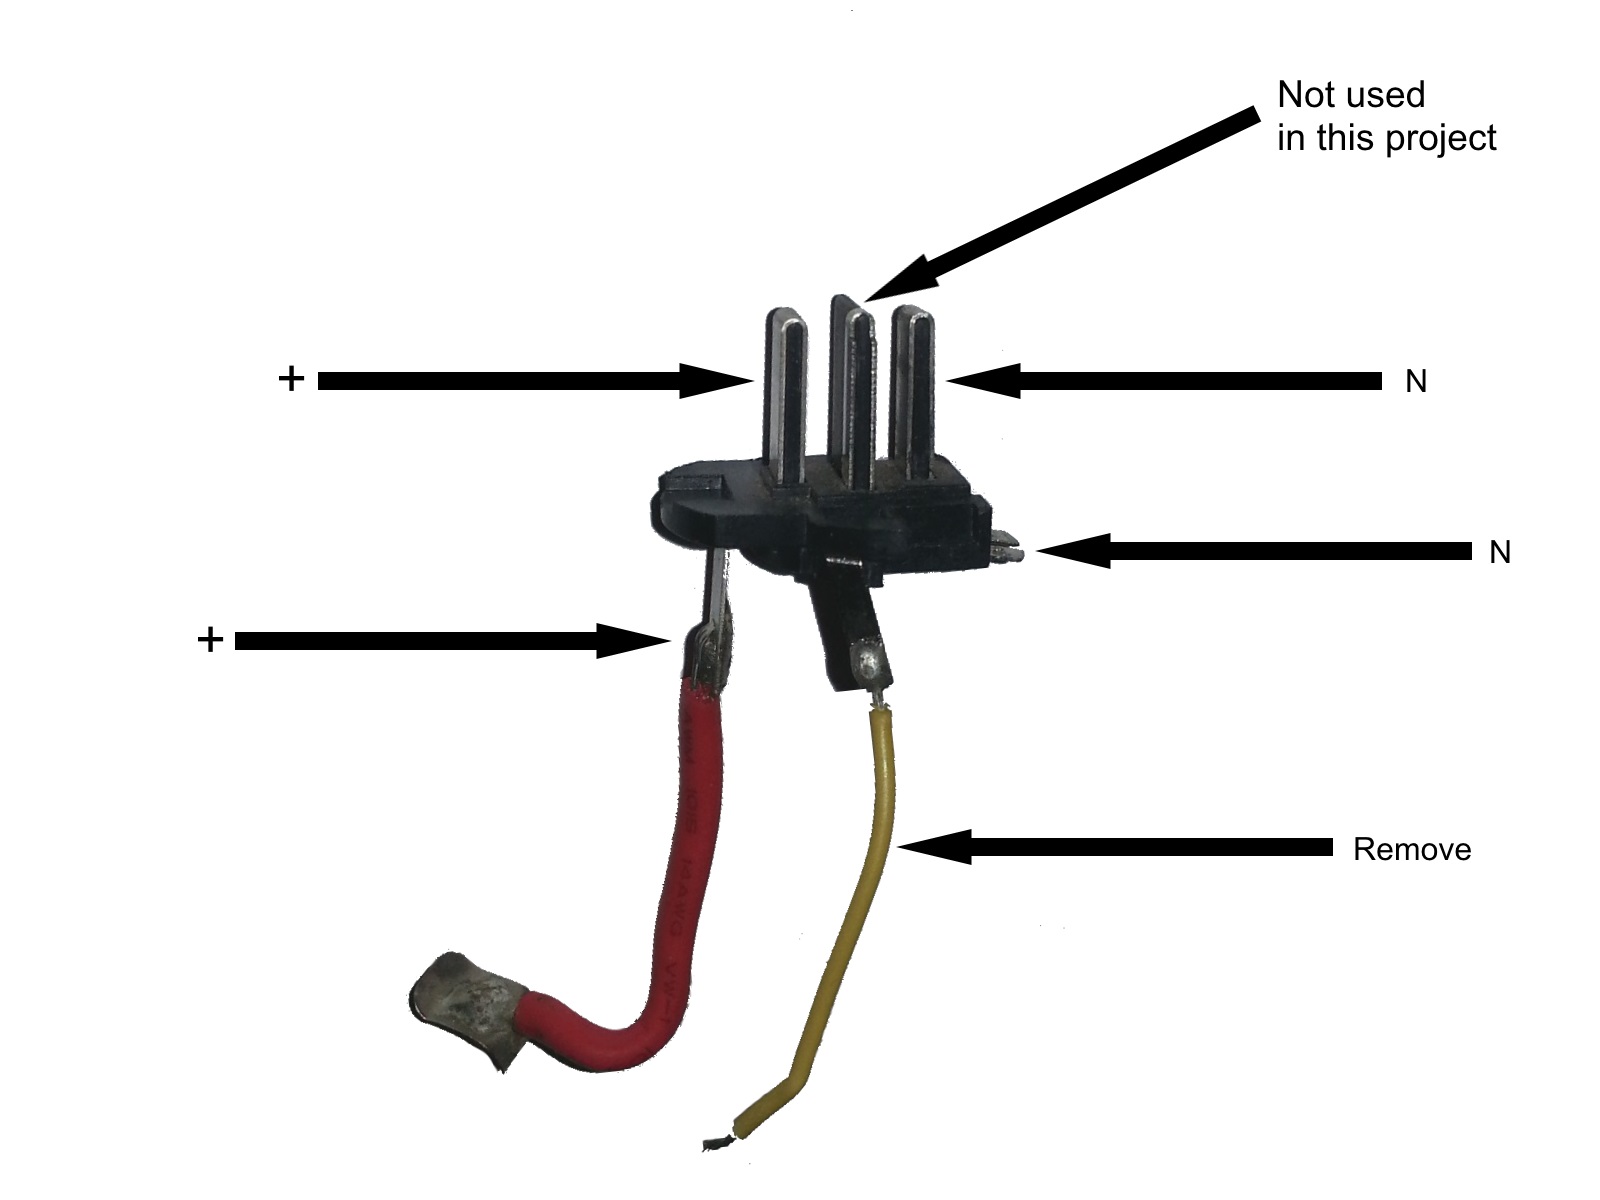
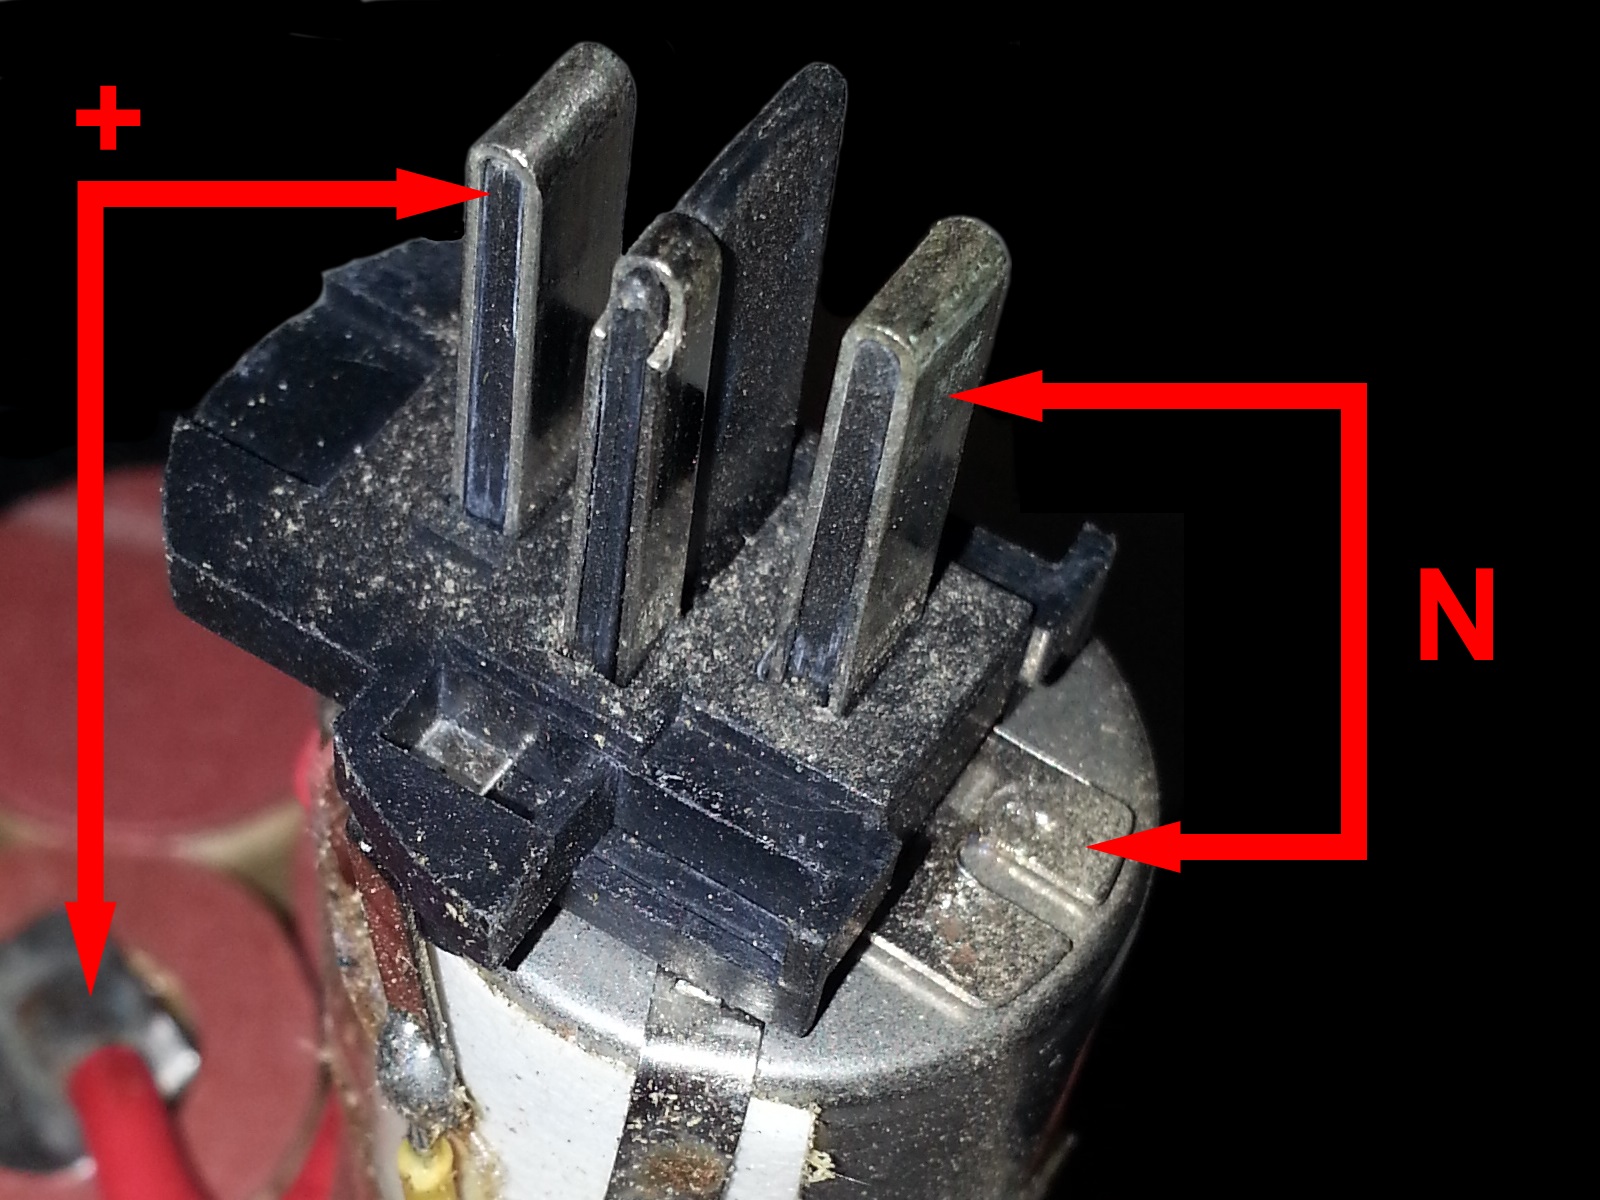
Identifying the connections
If I understand correctly, the terminal post that says “Not used in this project”, and the yellow wire marked “Remove” are part of the charging feedback system. Either way, the yellow wire and it’s tab will be removed. I will leave the terminal, but it won’t be connected to anything.
Index – Converting a 14.4v Battery to Corded DC Power Supply
- Converting a cordless tool battery to use a cord – chapter 1
- Converting a cordless tool battery to use a cord – chapter 2
- Converting a cordless tool battery to use a cord – chapter 3
- Stay tuned for – chapter 4