Converting a cordless tool battery to use a cord – chapter 1
Some time ago my father gave me several cordless tools that he had retired. They where pretty much on their last legs and he was moving over to the then, new lithium ion type batteries.
I appreciate cordless tools for their handiness, but overall my experience with them is that they don’t run long enough and the batteries stop taking a full charge way before I feel like they’ve paid for themselves. My understanding is the lithium batteries are better about holding a charge and can be recharged many more times than the Ni-Cd battery used for this project.
Why the Cordless to Corded Conversion?
I have several AC corded drills, so I don’t really “need” to build a corded, cordless drill. What I didn’t have was a 1/4 impact driver. This is a tool that I didn’t have a use for until I used one, now I don’t know how I got by without it. The cordless tools my dad gave me included a 1/4 impact driver, two 14.4v batteries. One battery was a Dewalt that works enough for quick tasks, the other was after market copy of the Dewalt, and it’s dead as a door nail.
Frankly the impact driver isn’t worth buying a new $60+ battery for, it makes more since to replace the driver and battery with a new one, but since I have the dead battery, Converting it over to use a cord looks like a fun project.
I’ve seen other people do projects like this, but for the most part they’ve converted drills to run off a remote power supply. That’s what this project is, except I want to convert the 1/4 impact driver. From what I can tell 1/4 impact drivers are always cordless, unlike drills that are easy to find in both formats.
Disassembly and evaluation of the battery components
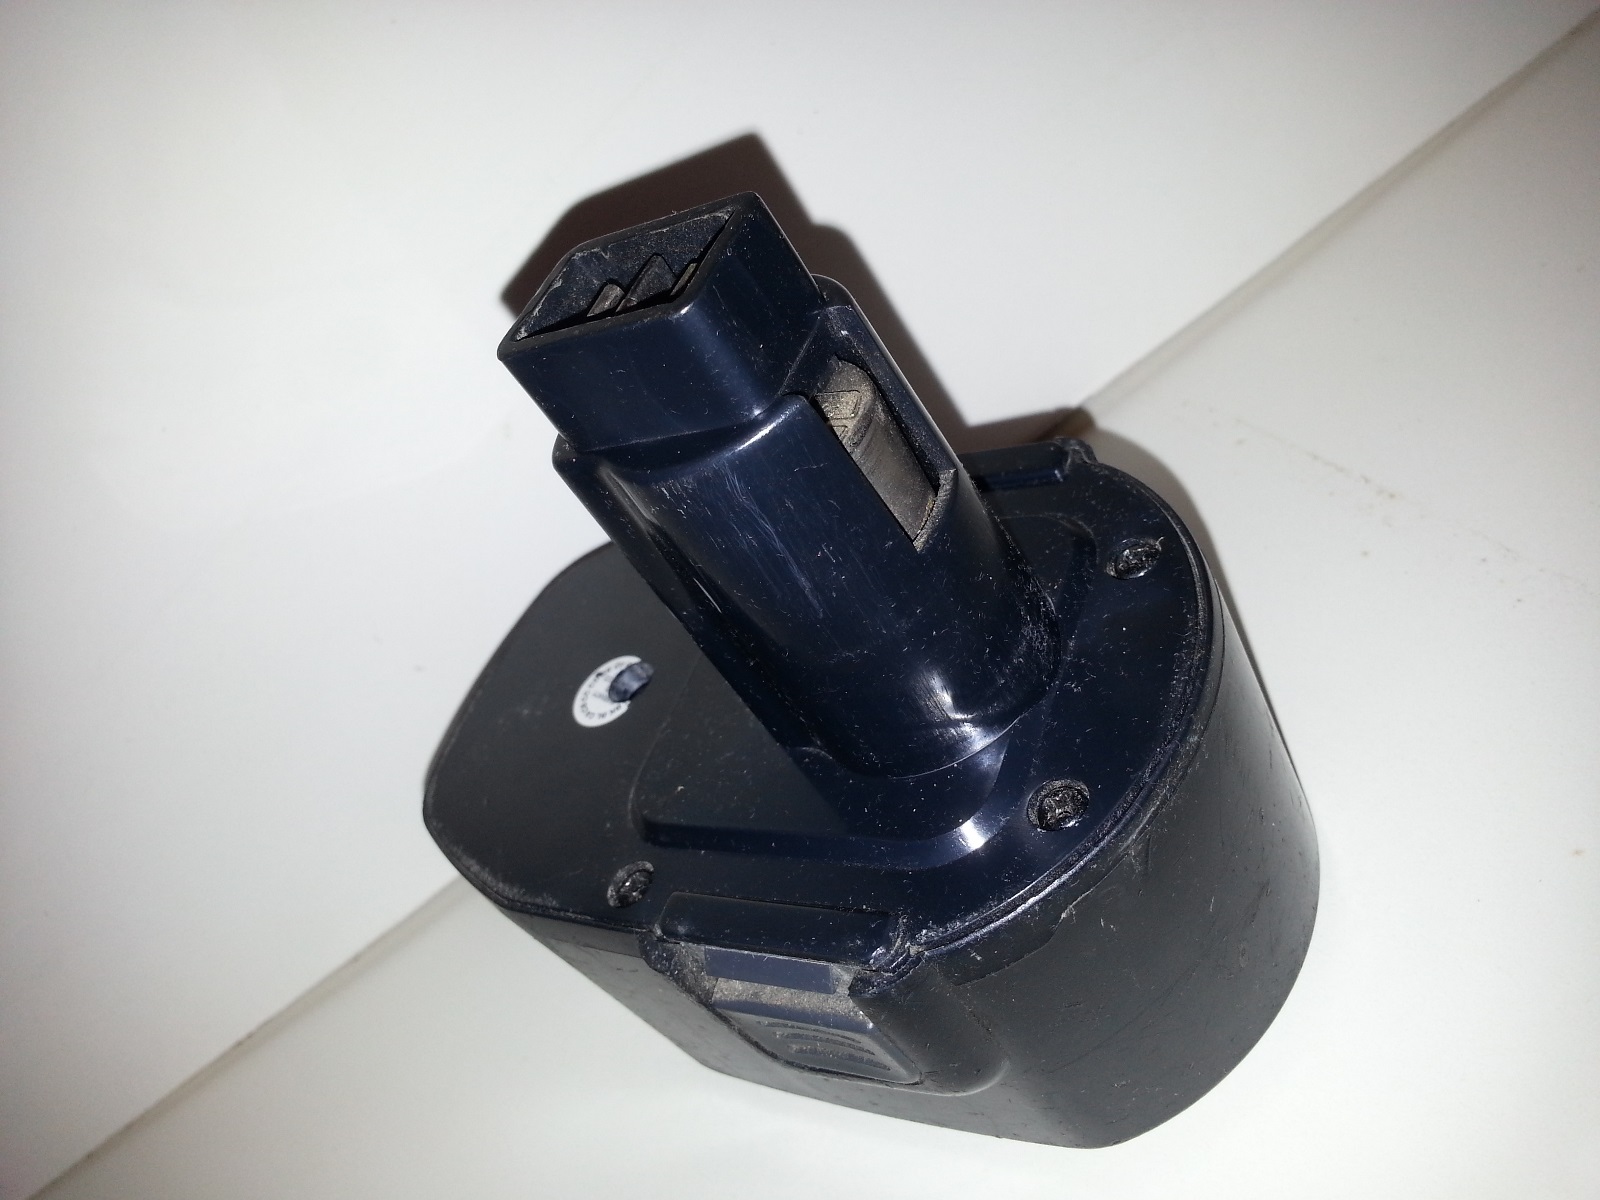
 This is the before photo of the after market, Dewalt® style, 14.4v battery. The internal cells are dead, but the shell, wiring and posts are in pretty good condition. It’s Marked “Premium Gold” brand, 14.4V-1500mAh, Ni-Cd. When I put it on the charger it looks like it’s charging, but it says it’s full after a few minutes and it’s pretty darn warm. If you try and run it after charging, the tool will run very slowly,and only for a short time.
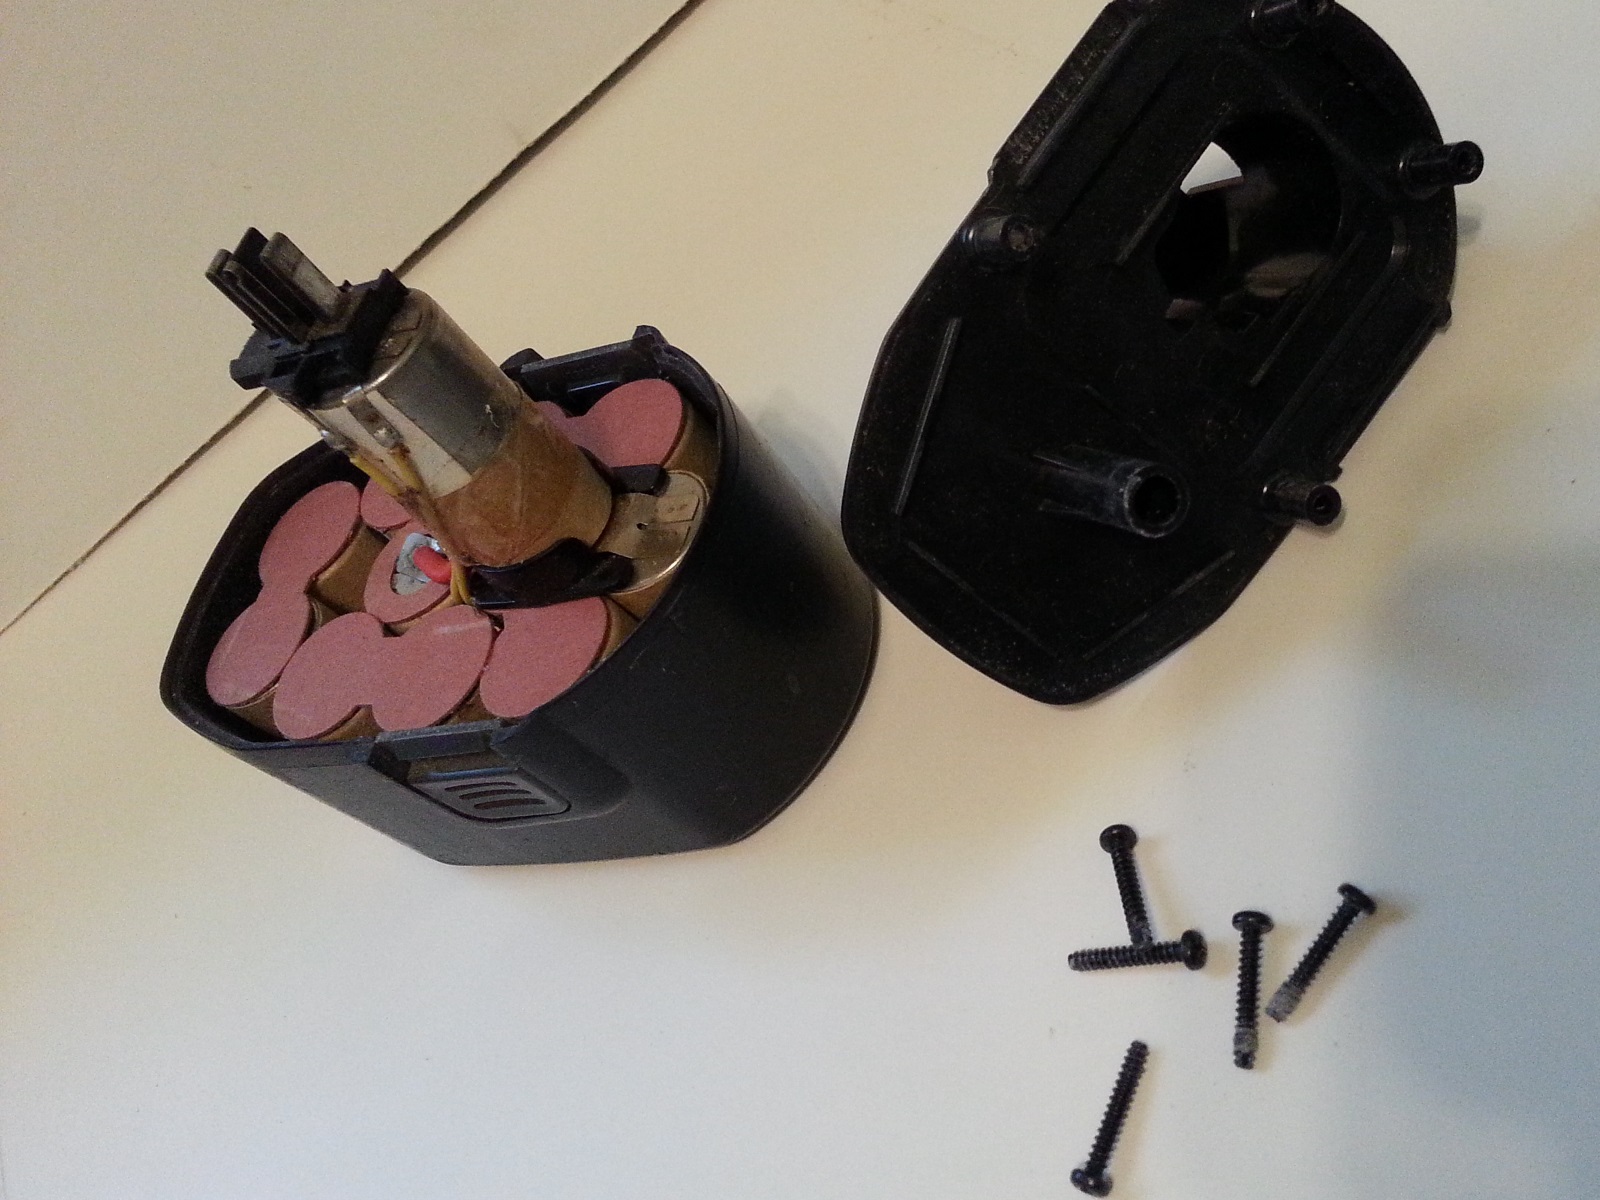 I removed the 5 screws. One is hidden under the sticker in the center top of the battery case. I’ll need to put a drop of glue in each of the screw holes, I get the feeling I wasn’t the first person who opened the battery pack shell. That said, the shell fits pretty snugly, for a knock off the fitment isn’t bad. I should also mention that since it was given to me used, I don’t know how long these cells lasted. I can’t speak to the quality of the battery calls.
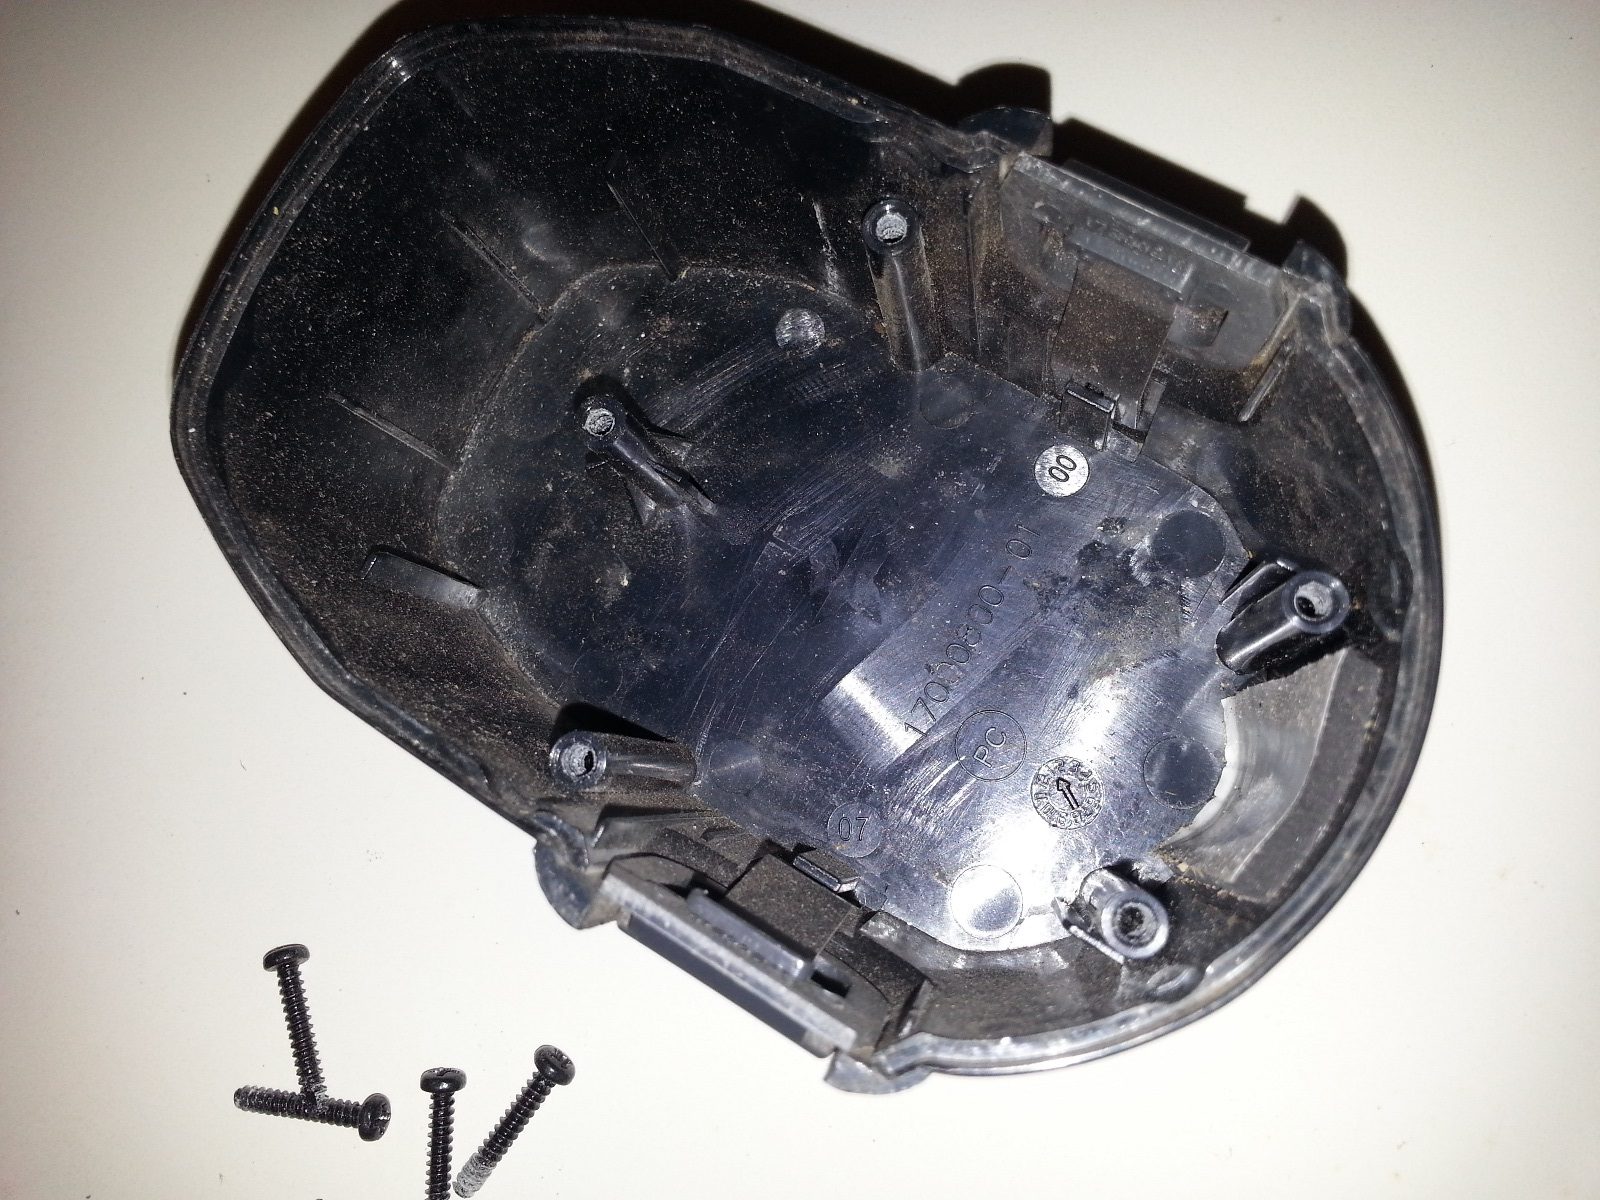 This is a look at the inside of the empty battery pack, showing the 5 screw posts. The battery pack cells are held into the shell bottom by a piece of double sided foam tape.they are also snugly fit into the shell so they don’t rattle around. If you take your time you can work them out of the shell without resorting to a screw driver or hammer. You want to keep in intact so you can measure, and salvage all of the parts.
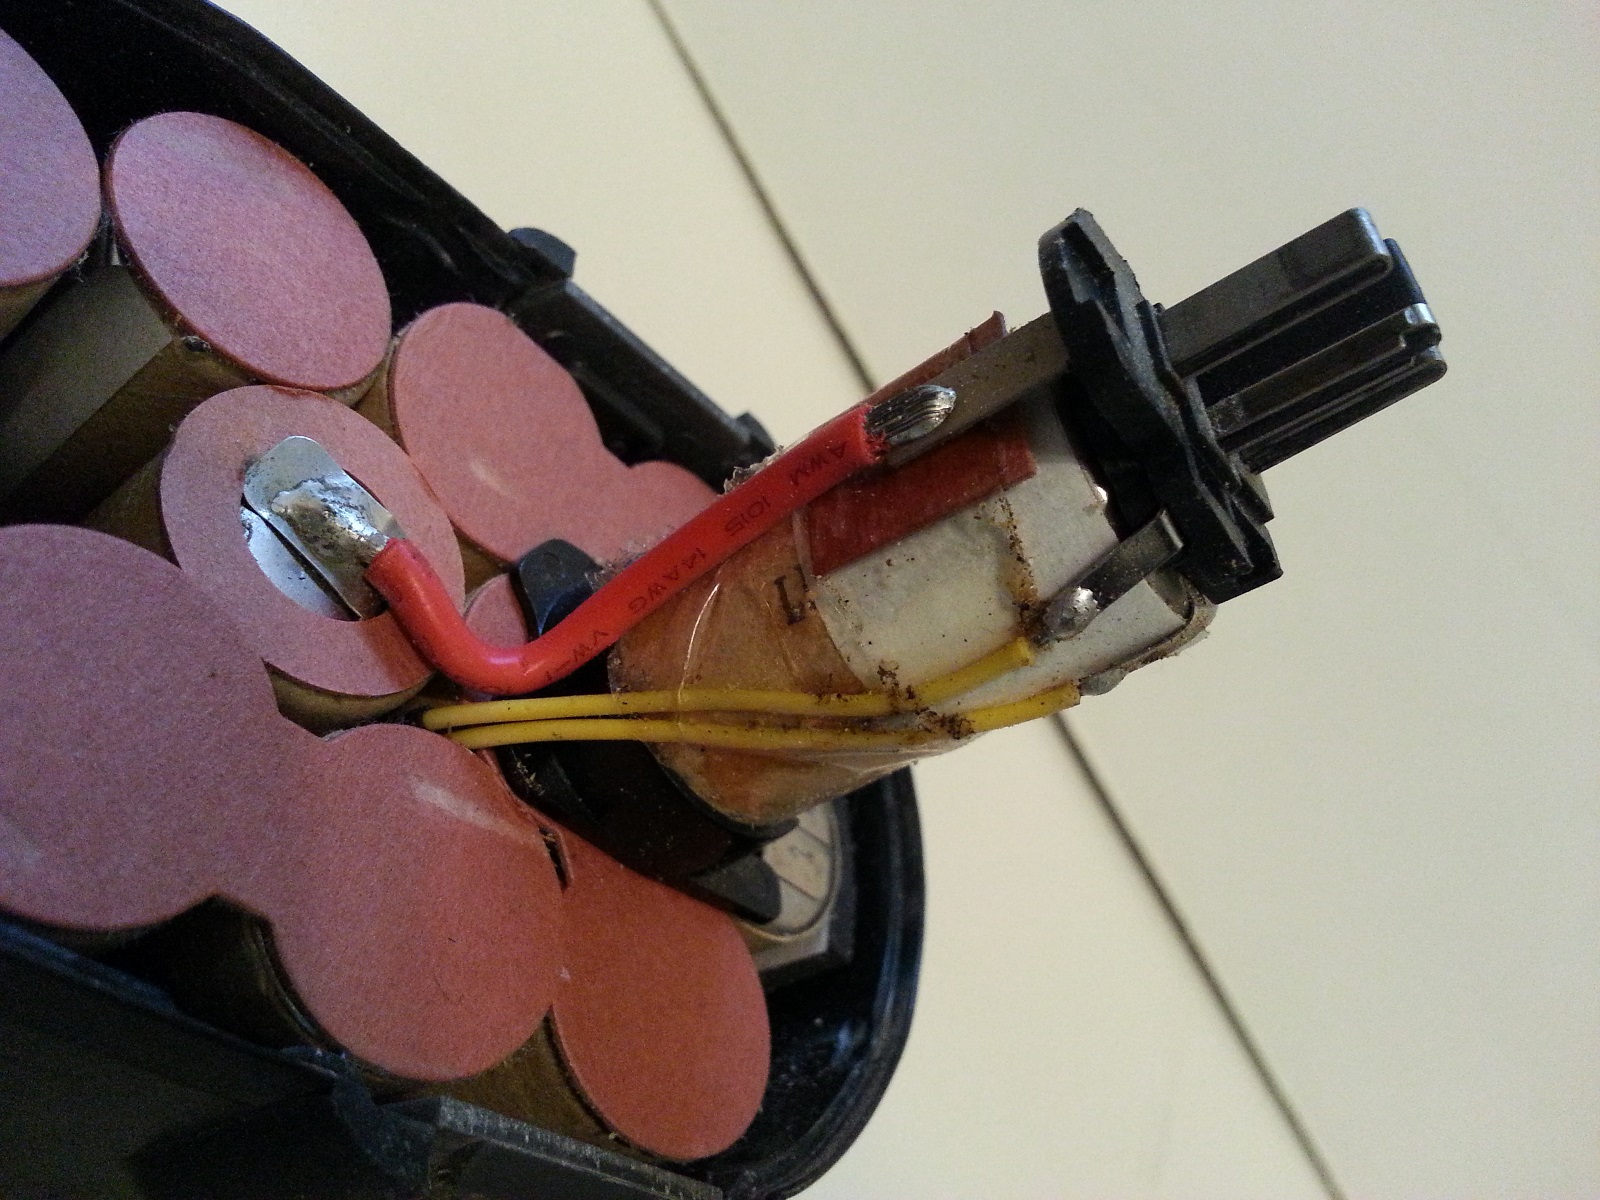 This is where the magic happens. Well kinda. My goal is to recreate this terminal without the battery cells. I would like to end up with the unit close to the same weight as it was with the cells inside. It isn’t too complicated, but I don’t want it to feel Jerry rigged, or to be a fire hazard when it’s done. Hell, I don’t even want to get shocked if it can be helped.
Making Rough Measurements
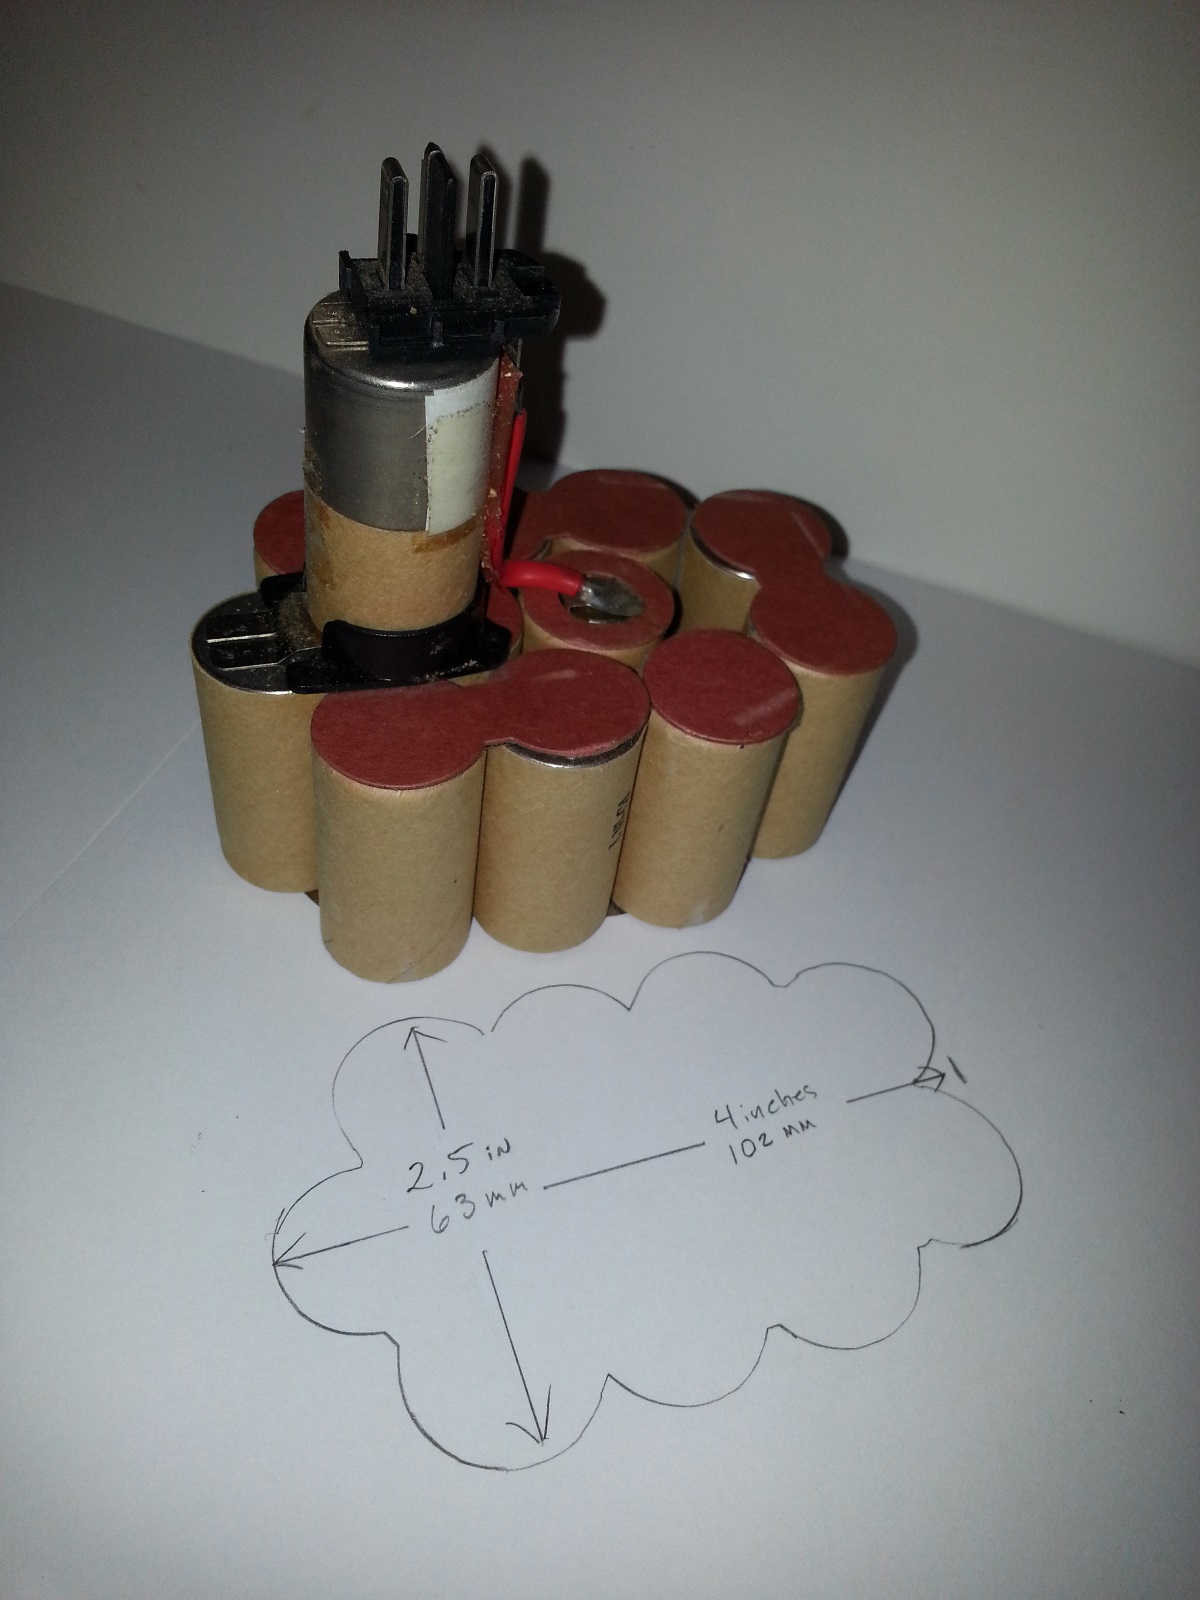 You get a good look at the cells that make up the battery pack, along with the rough footprint measurements. The footprint of the internal cell pack is roughly 2.5in(63mm) x 4in(102mm). Make sure that you make your own measurements since it’s unlikely that your battery pack is identical to this one. Also note the location of the battery support, battery cell (replacement object), and contact points that all need to line up inside the handle of the cordless tool.
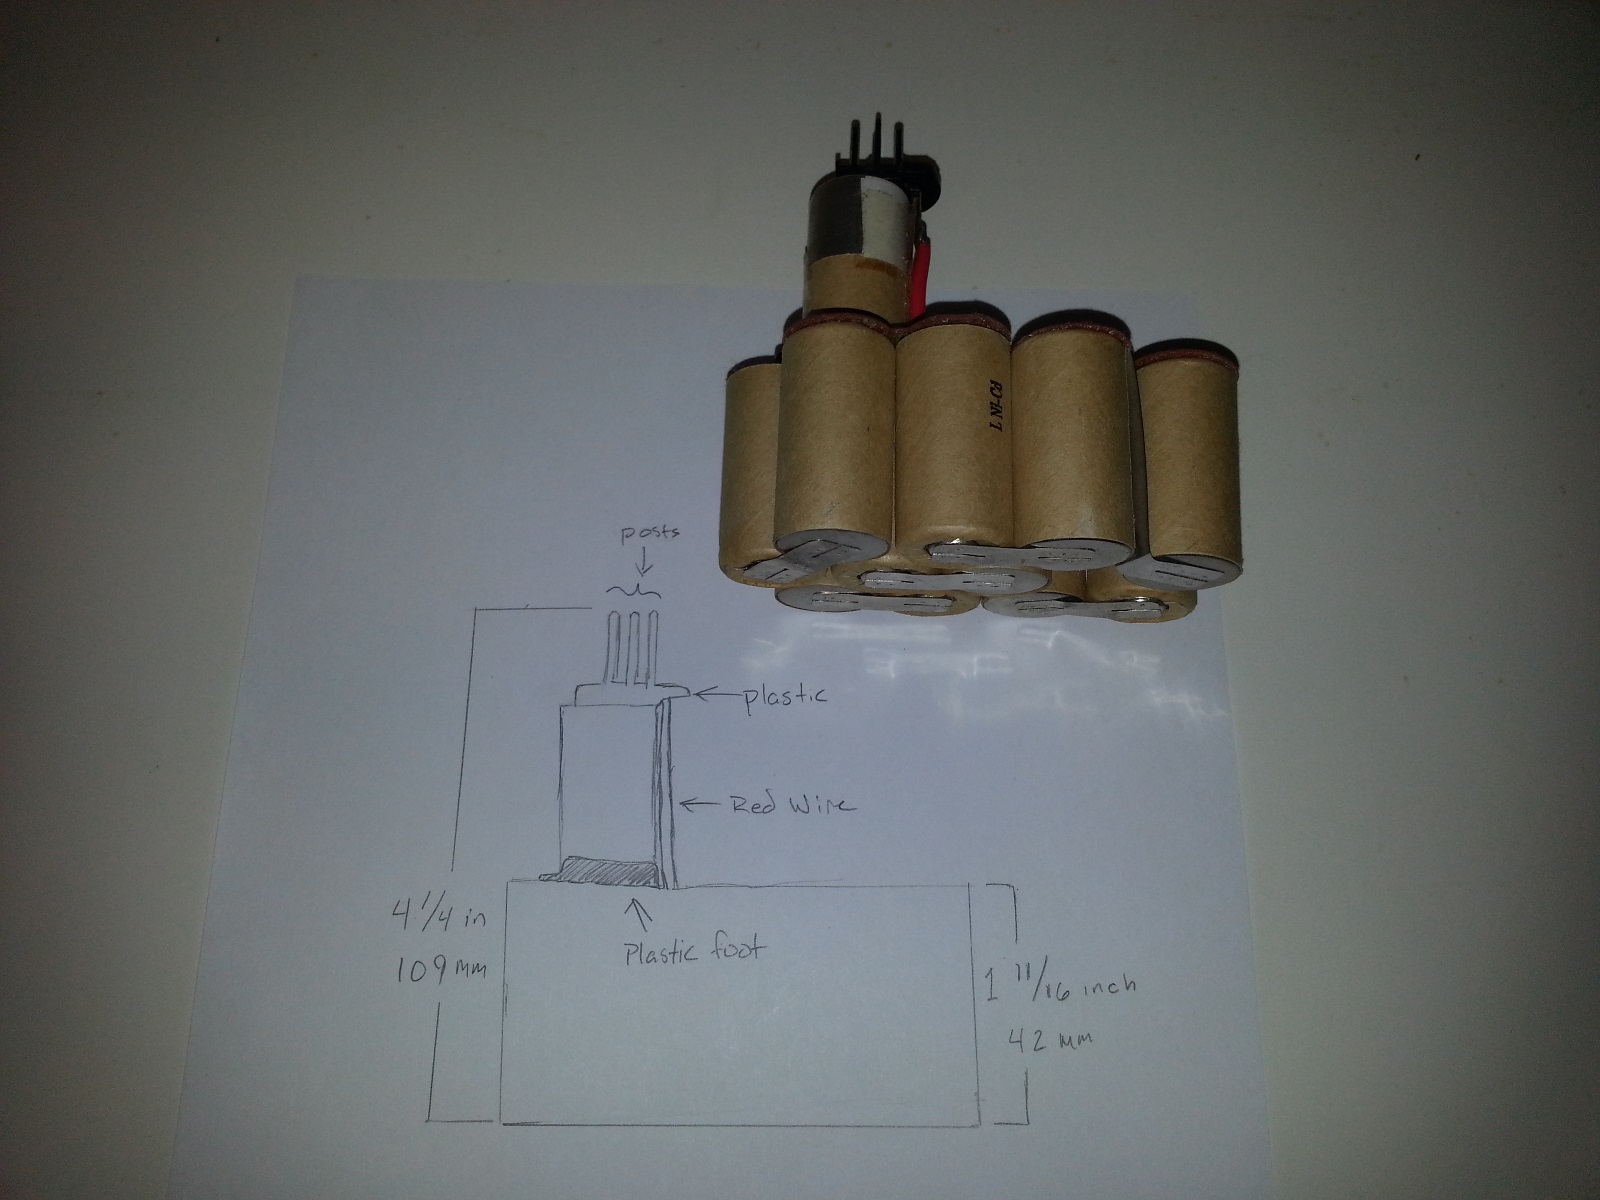 This is a side view of the battery pack with a rough measurement diagram. The next part of the process is getting the components separated and cleaned up.
Project Notes:
- Just for fun I put a small socket on my 1/2 inch pneumatic impact gun and tried using it as a driver. It worked, but it’s definitely too powerful, heavy and large to use for long in that roll. I didn’t test to failure, but my guess is that it would shear the .25″ conversion parts pretty quickly.
Index – Converting a 14.4v Battery to Corded DC Power Supply
- Converting a cordless tool battery to use a cord – chapter 1
- Converting a cordless tool battery to use a cord – chapter 2
- Converting a cordless tool battery to use a cord – chapter 3
- Stay tuned for – chapter 4